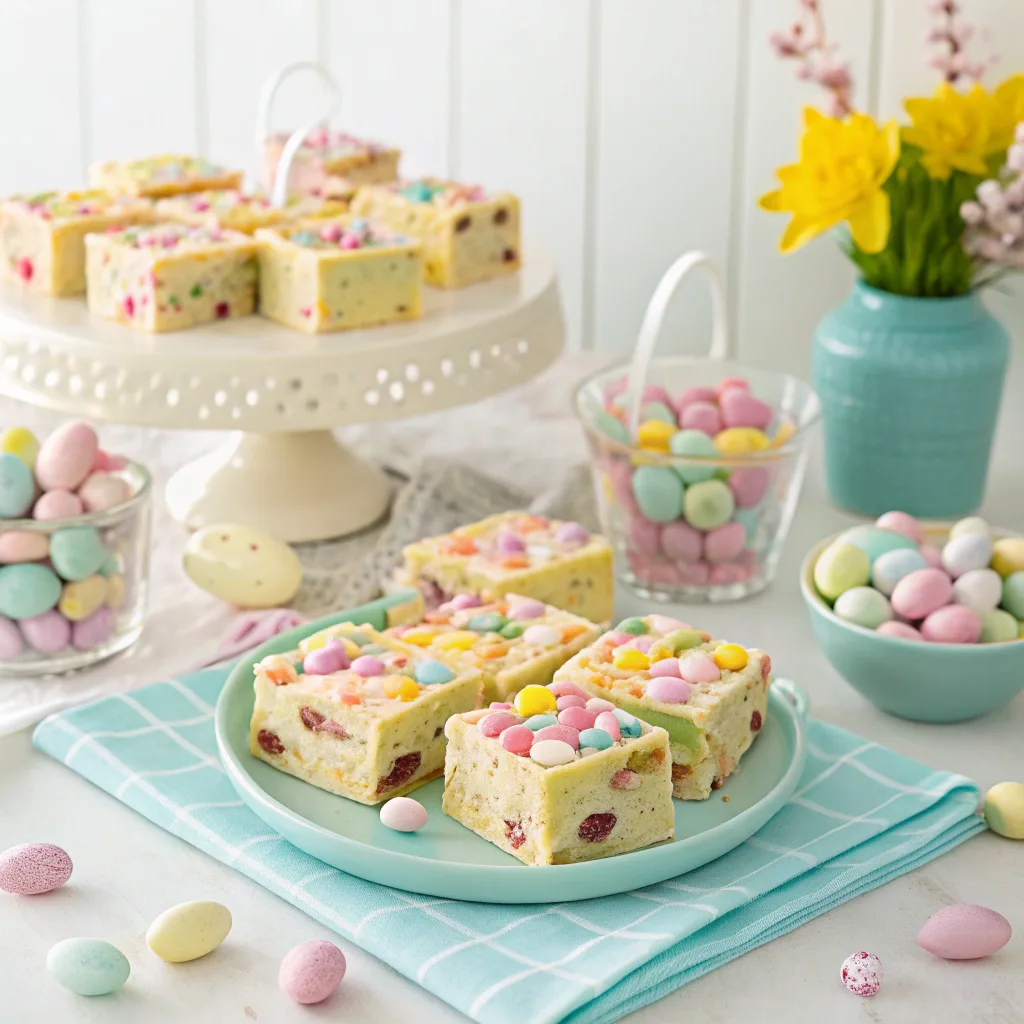
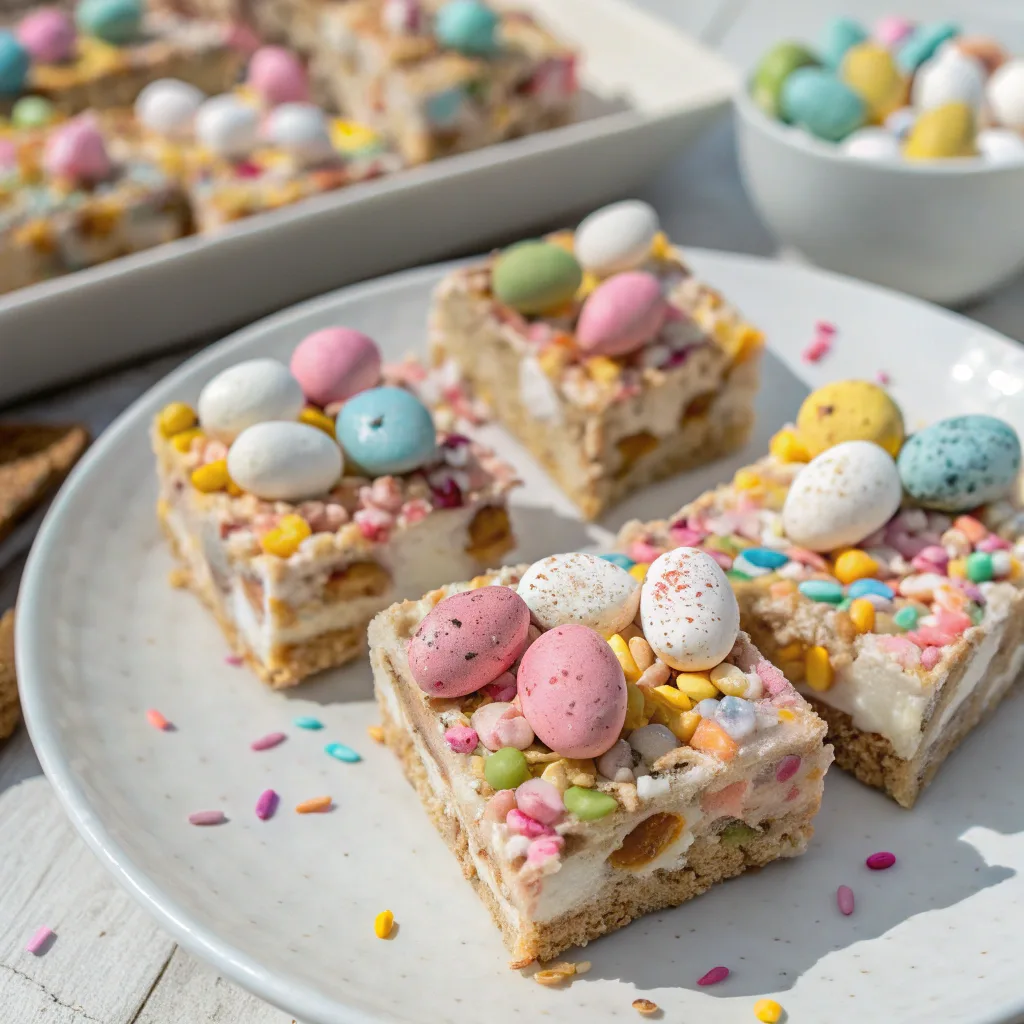
No-Bake Easter Rocky Road Bars are the ultimate spring treat — quick to make, fun to customize, and packed with marshmallows, chocolate, and festive Easter candy. No oven required, just chill, slice, and serve! Ideal for brunch tables, Easter baskets, or kid-friendly dessert projects.
Table of Contents
No-Bake Easter Rocky Road Bars
No-Bake Easter Rocky Road Bars are the ultimate quick-fix treat for your spring celebration — no oven required! These festive, chocolate-packed bars are loaded with gooey marshmallows, crunchy cookies, and bright Easter candies like mini eggs and bunny gummies. Perfect for busy families, last-minute hosts, or Easter brunch, they’re freezer-friendly, kid-approved, and endlessly customizable.
- Prep Time: 15 minutes
- Cook Time: 0 minutes
- Total Time: 15 minutes + chilling time (2 hours recommended)
- Yield: 16 bars
- Cuisine: American
Ingredients
-
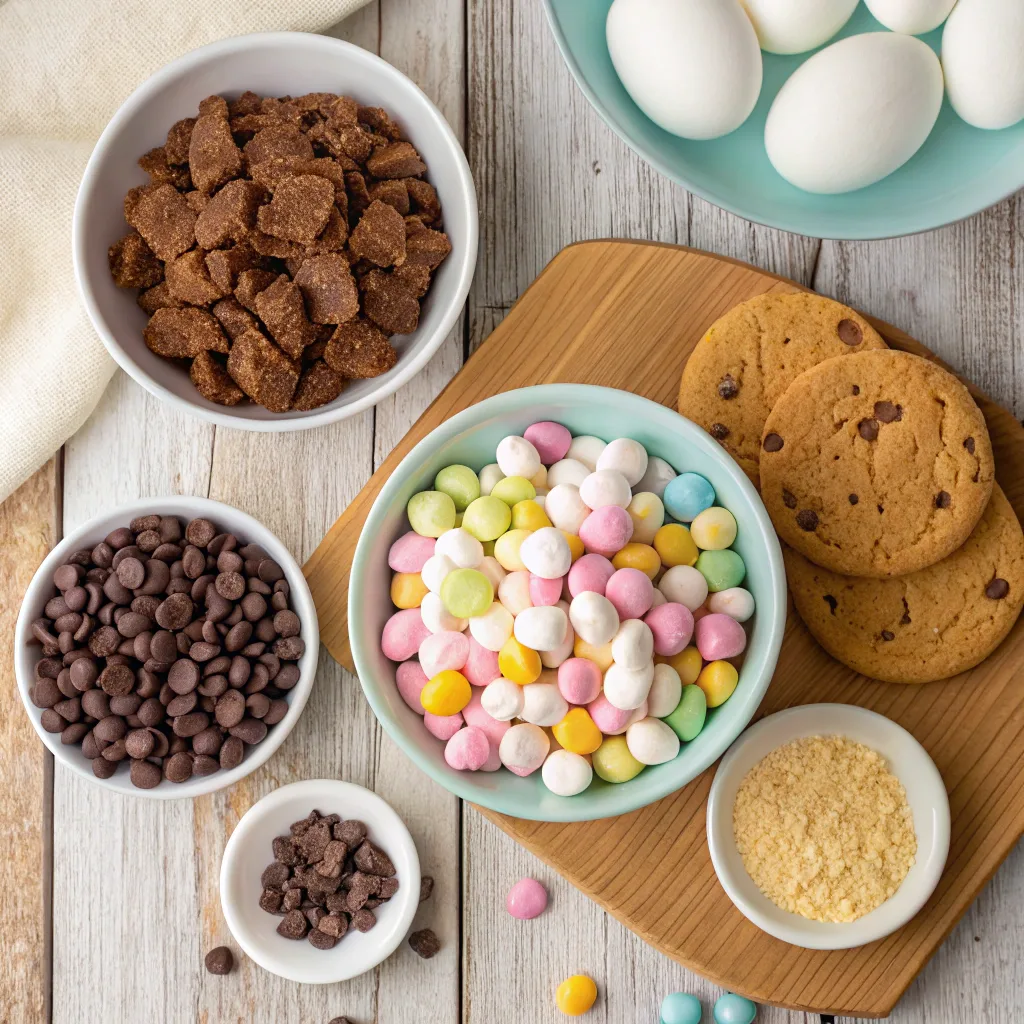
12 oz (340g) milk or dark chocolate (or a mix)
-
2 tbsp unsalted butter
-
2 tbsp golden syrup or corn syrup (or honey/maple syrup)
-
1/3 cup creamy peanut butter (optional)
-
1 1/2 cups mini marshmallows
-
1 cup crushed biscuits or graham crackers
-
1/2 cup mini chocolate eggs (plus extra for topping)
-
1/4 cup white chocolate chips
-
1/4 cup pastel-colored marshmallows
-
2 tbsp bunny gummies or jelly beans (optional)
-
2 tbsp pastel sprinkles
Instructions
-
Melt the chocolate: In a microwave-safe bowl or over a double boiler, melt the chocolate in 20–30 second bursts, stirring until smooth.
-
Add butter and syrup: Stir in the unsalted butter and golden syrup until glossy.
-
Incorporate peanut butter (optional): Swirl in the peanut butter until fully blended.
-
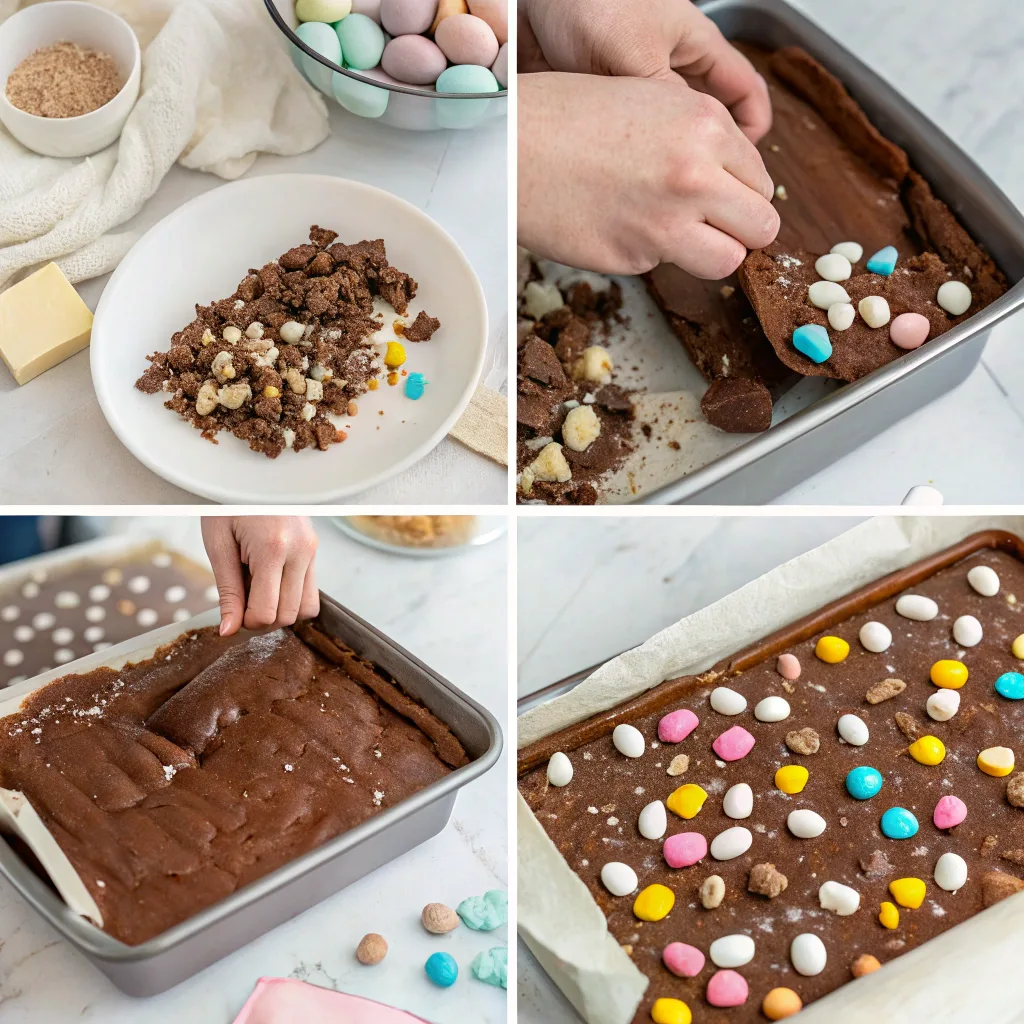
Combine dry ingredients: Fold in mini marshmallows, crushed biscuits, white chocolate chips, and pastel marshmallows.
-
Add Easter candies: Gently mix in mini eggs, bunny gummies, and half the sprinkles.
-
Prepare pan: Line an 8×8 or 9×9-inch square pan with parchment paper.
-
Transfer mixture: Pour the mixture into the pan and press it down evenly with a spoon or spatula.
-
Decorate: Sprinkle remaining mini eggs and pastel sprinkles on top.
-
Chill: Refrigerate for at least 2 hours or freeze for 1 hour until fully set.
-
Slice and serve: Use a warm knife for clean cuts. Store leftovers in the fridge or freeze for later.
Notes
-
Nut-Free: Use sunflower seed butter or cookie butter instead of peanut butter.
-
Gluten-Free: Replace cookies with gluten-free alternatives like crushed GF digestives or puffed rice.
-
Vegan-Friendly: Choose dairy-free chocolate, vegan marshmallows, and plant-based butter.
-
Creative Twist: Use silicone egg molds for fun, Easter-egg-shaped bars.
-
Storage Tip: Keeps for 5–7 days in the fridge or up to 2 months in the freezer.
Nutrition
- Serving Size: 1 bar (approximately 2-inch square)
- Calories: 210
- Fat: 11g
- Carbohydrates: 26g
- Protein: 2g
What Are No-Bake Easter Rocky Road Bars?
Understanding Rocky Road Bars and Why They’re Loved
No-Bake Easter Rocky Road Bars are a fun, festive twist on the traditional rocky road dessert. Made with rich melted chocolate, gooey marshmallows, crunchy cookie pieces, and bright Easter candies like mini eggs or jelly beans, these bars are a show-stopper for any spring gathering. What makes them so popular? It’s the irresistible blend of textures — soft, crispy, creamy, and chewy — all layered into one easy-to-make treat.
These no-bake bars have become an Easter favorite because they’re simple, flexible, and incredibly delicious. Whether you like yours with peanut butter swirls, colorful sprinkles, or crunchy nuts, you can make No-Bake Easter Rocky Road Bars your own with just a few ingredient swaps. They also make perfect gifts or party table additions because they look just as good as they taste.
And for those with dietary needs, they’re easily adaptable — go nut-free, gluten-free, or even vegan depending on your choice of chocolate and mix-ins.
Why “No-Bake” Is a Game-Changer for Home Bakers
One of the biggest reasons people love No-Bake Easter Rocky Road Bars is the fact that they don’t require an oven. That’s right — you get all the rich, chocolatey goodness without preheating, baking, or even babysitting a timer. This makes the recipe not just fast, but also safe and stress-free — a huge plus for parents baking with kids.
Here’s why no-bake is the way to go:
- Saves time — these bars set in the fridge while you prep other meals
- Frees up oven space during busy Easter cooking hours
- Reduces mess — fewer bowls, trays, and tools
- Kid-friendly — no heat means even toddlers can help with mixing and decorating
No-Bake Easter Rocky Road Bars are especially great when you’re looking for something that delivers both fun and flavor. They chill firm, slice clean, and taste like a cross between fudge and a candy bar — rich, colorful, and crowd-pleasing. Whether you’re throwing together a quick dessert tray or building Easter baskets, these bars fit the bill perfectly.
Essential Ingredients for No-Bake Easter Rocky Road Bars

Classic Ingredients That Define Rocky Road
The foundation of No-Bake Easter Rocky Road Bars lies in a simple but indulgent combination of sweet and crunchy textures. Here’s a breakdown of the staple ingredients that create that iconic rocky road flavor:
- Chocolate – Choose high-quality milk chocolate for a classic creamy finish, or go for dark chocolate for a deeper, richer taste. A mix of both works well too.
- Mini Marshmallows – These add the soft, chewy texture that contrasts beautifully with the hardened chocolate layer.
- Crushed Biscuits or Graham Crackers – This adds the much-needed crunch. Digestive biscuits, vanilla wafers, or even pretzels can all work.
- Butter – Just a small amount of unsalted butter helps smooth out the melted chocolate and bind everything together.
- Golden Syrup or Corn Syrup – Adds sweetness and helps with that glossy, smooth chocolate texture. You can also use honey or maple syrup as an alternative.
- Peanut Butter (optional) – Swirling in peanut butter gives your No-Bake Easter Rocky Road Bars a rich, nutty twist that many chocolate lovers adore.
These ingredients form the backbone of the dessert. Once you’ve nailed this base, it’s time to get creative and go full-on Easter mode.
Festive Easter Add-ins: Mini Eggs, Marshmallows, Sprinkles & More
Now comes the fun part — transforming your classic rocky road into a colorful, seasonal showpiece. Easter-themed ingredients make these bars not only taste amazing but also look incredibly festive. Consider these playful additions:
| Easter Add-In | Purpose & Flavor Boost |
|---|---|
| Mini Chocolate Eggs | Adds crunch and color; visually screams “Easter” |
| Bunny Gummies | Fun for kids; adds chewy, fruity contrast |
| Colored Marshmallows | Extra sweetness and pastel color appeal |
| Pastel Sprinkles | Perfect final touch to dress up the top |
| White Chocolate Chips | Adds a sweet, creamy layer of contrast |
| Crushed Candy Coated Chocolates | Crunchy texture + Easter candy charm |
If you’re creating these No-Bake Easter Rocky Road Bars for a crowd or a kids’ party, don’t be shy with color. Bright, candy-covered bars are not only more inviting — they also make for great Easter basket fillers or brunch table centerpieces.
Don’t miss our refreshing side dish ideas like this Seven Layer Salad, perfect for balancing out the sweetness of your No-Bake Easter Rocky Road Bars at any spring gathering!
Step-by-Step Guide to Making No-Bake Easter Rocky Road Bars

Preparing the Chocolate Base
The first and most crucial step in making No-Bake Easter Rocky Road Bars is melting and combining your base ingredients. This step sets the tone for texture, flavor, and how well your bars hold together.
- Melt the Chocolate
In a microwave-safe bowl or over a double boiler, melt your choice of chocolate (milk, dark, or both). Stir every 20–30 seconds if using the microwave to prevent burning. - Add Butter and Syrup
Once smooth, stir in the unsalted butter and golden syrup (or corn syrup). This helps create that glossy, soft-set finish. The heat should be low — you want it melted, not scorched. - Incorporate Peanut Butter (Optional)
For extra richness, swirl in a few tablespoons of creamy peanut butter. This not only boosts the flavor but also gives the bars a fudgy texture that balances the crunch.
Pro Tip: Want to make these No-Bake Easter Rocky Road Bars dairy-free? Use dairy-free chocolate chips and coconut oil instead of butter.
Layering the Perfect Texture and Crunch
Now it’s time to bring the bars to life with texture and color. This part is all about building layers that look good and taste even better.
- Stir in Dry Ingredients
Fold in mini marshmallows, crushed biscuits, and any add-ins like pretzels or white chocolate chips. Be gentle — you don’t want to crush everything. - Add the Easter Magic
Toss in your mini eggs, pastel sprinkles, bunny gummies, or colored marshmallows. Save a handful of these to sprinkle on top before chilling. - Pour and Press into Pan
Line an 8×8 or 9×9 inch baking tray with parchment paper. Pour in the mixture and press it evenly with the back of a spoon or a piece of wax paper. Top with the reserved candy and a final dusting of crushed mini eggs or more sprinkles.
Setting and Chilling Without Baking
The beauty of No-Bake Easter Rocky Road Bars is that the fridge does all the hard work.
- Chill Until Firm
Place the tray in the refrigerator for at least 2 hours. If you’re in a rush, 45–60 minutes in the freezer will work too. - Slice and Serve
Once the mixture has set, remove it from the tray and slice into squares or rectangles. Use a warm knife (run it under hot water, then dry) for clean cuts. - Store Smart
These bars keep well in an airtight container in the fridge for up to 7 days — but good luck making them last that long!
Ingredient Substitutions and Dietary Variations
Peanut-Free, Nut-Free, and Gluten-Free Alternatives
One of the best things about No-Bake Easter Rocky Road Bars is how easy they are to customize. Whether you’re serving guests with allergies or just looking for a healthier twist, you can make a few simple swaps and still enjoy every bite of these festive no-bake treats.
Need a peanut-free version?
Skip the peanut butter or replace it with allergy-friendly options like:
- Sunflower seed butter – a nut-free favorite with a mild flavor
- Cookie butter (Biscoff) – adds sweetness and a hint of spice
- Tahini – a more savory twist that balances sweet ingredients
- Marshmallow fluff or cream cheese – for creaminess without nuts
Always double-check your mix-ins. Many store-bought Easter candies, including mini eggs and coated chocolates, may contain traces of nuts, so it’s best to review the labels carefully before adding them to your No-Bake Easter Rocky Road Bars.
Gluten-free adaptation? No problem.
Instead of crushed biscuits or graham crackers, try:
- Gluten-free shortbread or digestive cookies
- Crushed gluten-free pretzels
- Gluten-free puffed rice or crispy cereal
These alternatives keep the classic crunch without the gluten, making your No-Bake Easter Rocky Road Bars safe for more people to enjoy.
For dairy-free bars, simply substitute:
- Vegan chocolate chips or bars (look for 70% cocoa dark chocolate or specialty brands)
- Coconut oil or plant-based margarine instead of butter
- Vegan marshmallows – many are gelatin-free and made with plant-based ingredients
With these substitutions, you can serve No-Bake Easter Rocky Road Bars at almost any gathering, knowing they’re inclusive, allergy-aware, and still totally delicious.
Using Dark Chocolate vs. Milk Chocolate: Flavor and Texture Differences
The type of chocolate you use can totally transform your batch of No-Bake Easter Rocky Road Bars. Let’s compare the two most popular options.
Milk Chocolate
- Sweeter and more kid-friendly
- Has a smooth, creamy finish
- Balances stronger flavors like salty peanut butter or tart gummies
Dark Chocolate
- Richer and less sweet
- Provides a more intense chocolate flavor
- Works well with sophisticated mix-ins like almonds, cranberries, or orange zest
Want the best of both worlds?
Try a 50/50 blend of dark and milk chocolate — your No-Bake Easter Rocky Road Bars will have depth, balance, and mass appeal.
Chocolate type doesn’t just affect flavor — it also impacts texture. Milk chocolate tends to set a little softer, while dark chocolate firms up more cleanly, making it easier to slice neatly after chilling.
No matter which chocolate you choose, your No-Bake Easter Rocky Road Bars will still be a show-stopping hit at any Easter party or springtime get-together.
Storing, Serving, and Shelf Life Tips
How to Store Peanut Butter Rocky Road for Freshness
One of the most common questions about No-Bake Easter Rocky Road Bars — especially those with peanut butter — is how to store them so they stay fresh, firm, and flavorful.
To maintain the ideal texture and prevent melting or softening:
- Store in an airtight container – This keeps out moisture and prevents the bars from going stale.
- Layer with parchment paper – If stacking the bars, place parchment paper between layers to avoid sticking.
- Keep refrigerated – Especially if you’ve included peanut butter or any dairy-based add-ins. This helps the bars stay firm and extends their shelf life.
For best results, store your No-Bake Easter Rocky Road Bars in the fridge for up to 7 days. They’ll remain chewy, crunchy, and absolutely delicious the entire week — though they’re rarely around that long!
If you want to prep in advance, these bars also freeze beautifully. Simply wrap tightly in plastic wrap or foil, place in a freezer-safe container, and freeze for up to 2 months. When ready to eat, thaw in the fridge for a few hours or overnight.
Discover great ideas like pre-freezing dessert bars for party prep in our time-saving Easter entertaining guide — coming soon on Easy Tasty Kitchen.
How Long Does Rocky Road Last?
Wondering how long your No-Bake Easter Rocky Road Bars will stay fresh? Here’s a quick guide:
| Storage Method | Shelf Life | Notes |
|---|---|---|
| Room Temperature | 2–3 days | Only recommended if home is cool & dry |
| Refrigerated | 5–7 days | Keeps chocolate set and bars fresh |
| Frozen | Up to 2 months | Great for make-ahead Easter prep |
When stored properly, No-Bake Easter Rocky Road Bars maintain their shape and flavor without losing that satisfying crunch. Keep them in a cool environment and avoid direct sunlight or warm kitchens, especially if your Easter celebration is outdoors.
Can I Use Dark Chocolate or Milk Chocolate for This Recipe?
Absolutely! One of the most flexible things about making No-Bake Easter Rocky Road Bars is that both dark chocolate and milk chocolate work perfectly — it all comes down to your flavor preference.
- Milk chocolate gives your bars a sweeter, creamier profile, which is ideal if you’re making them for kids or candy lovers.
- Dark chocolate offers a bolder, more intense cocoa taste that pairs well with add-ins like nuts, dried fruits, or a touch of sea salt.
Pro Tip: Combine both for a layered flavor experience that balances richness with sweetness.
Whether you lean classic or gourmet, these bars always deliver — and you can easily tweak the chocolate based on what you have on hand.
Creative Twists for Easter-Themed Rocky Road

Adding Colorful Candy Eggs, Bunny Gummies, and Pastel Layers
When it comes to dressing up your No-Bake Easter Rocky Road Bars, the possibilities are endless. These bars are already delicious, but turning them into an Easter showstopper is as easy as grabbing a few seasonal goodies.
Here are some festive favorites to elevate your bars:
- Mini Candy Eggs: Crush a few for texture and sprinkle some whole ones on top for a pop of color.
- Bunny Gummies or Peeps: Press these into the top of your bars just before chilling for a playful touch.
- Colored Mini Marshmallows: Swap standard white for pastel-colored marshmallows for added color and sweetness.
- Layered Chocolate: Add a second drizzle layer of melted white or pink candy melts over the top after chilling.
- Easter Sprinkles: Use pastel nonpareils, sugar pearls, or even carrot-shaped confetti to make the top extra festive.
Tip: Mix a few drops of food coloring into white chocolate and swirl it over the top of your No-Bake Easter Rocky Road Bars for a marbled look that screams spring.
These decorative choices aren’t just fun — they also make your dessert table pop and photograph beautifully for sharing on social media or Easter brunch spreads.
Themed Serving Ideas for Kids and Easter Brunch Tables
Presentation matters, especially during a holiday like Easter where everything is colorful and joyful. Fortunately, your No-Bake Easter Rocky Road Bars are easy to style for both casual snacking and elegant entertaining.
Try these fun serving ideas:
- Easter Basket Filler: Cut the bars into small squares, wrap in pastel foil or clear candy bags, and pop them into Easter baskets.
- Dessert Tray Centerpiece: Arrange on a white platter and top with edible grass or nestle between dyed eggs for a themed display.
- Cupcake Liners for Kids: Cut into small chunks and place in pastel liners for mess-free party treats.
- Egg-Shaped Mold: Press the mixture into silicone egg molds instead of a square tray for a literal Easter twist.
If you’re entertaining kids, let them decorate the top layer themselves — it’s a fun hands-on activity that keeps them engaged while the bars chill.
Conclusion
No-Bake Easter Rocky Road Bars are more than just a quick treat — they’re a festive, flexible, and foolproof dessert that’s perfect for spring. With just a few pantry ingredients and a handful of colorful Easter candies, you can create a batch of sweet, crunchy, and chewy bars that everyone will love.
From kid-friendly Easter activities to allergy-friendly variations and freezer-friendly prep, these bars truly check every box. Whether you’re serving them at brunch, tucking them into Easter baskets, or saving them for a late-night chocolate fix, you’ll be glad you skipped the oven and went no-bake.
For more kitchen inspiration and behind-the-scenes cooking tips, follow us on Facebook and check out our Pinterest for even more recipe ideas you’ll love. Never miss a new recipe!
Popular Rocky Road FAQs Answered
How Do I Store Peanut Butter Rocky Road?
Storing No-Bake Easter Rocky Road Bars — especially with peanut butter — is easy and essential for maintaining their texture. To keep them firm, flavorful, and ready to enjoy:
Refrigerate in an airtight container – This keeps the bars fresh and prevents them from softening or absorbing other fridge odors.
Use parchment paper between layers – This helps avoid sticking if you’re stacking them.
Store up to 7 days in the fridge – They’ll stay chewy and crunchy for a full week.
For longer storage, freeze your No-Bake Easter Rocky Road Bars. Wrap tightly in plastic wrap, then place in a sealed container or freezer bag. They’ll last up to 2 months. Thaw in the fridge for a few hours before serving.
Can I Use Dark Chocolate or Milk Chocolate for This Recipe?
Absolutely! One of the best things about No-Bake Easter Rocky Road Bars is how customizable they are — especially when it comes to the chocolate.
Milk chocolate gives a sweeter, creamier finish — ideal for kids or those who love traditional Easter treats.
Dark chocolate offers a richer, more intense cocoa flavor — perfect for more mature palates or to pair with salty mix-ins like pretzels or peanuts.
Want a flavor that suits everyone? Combine the two! A 50/50 blend creates No-Bake Easter Rocky Road Bars that are balanced, bold, and crowd-pleasing.
How Long Does Rocky Road Last?
How long your No-Bake Easter Rocky Road Bars last depends on how you store them:
Storage Method
Shelf Life
Best Practice
Room Temperature
2–3 days
Only if it’s cool and dry
Refrigerator
5–7 days
Ideal for daily snacking and freshness
Freezer
Up to 2 months
Great for prepping ahead of Easter events
Just remember: warmer temps can cause your bars to soften, especially if you’ve added peanut butter or light chocolate. Keep them chilled and sealed to preserve the perfect no-bake texture.


1 thought on “No-Bake Easter Rocky Road Bars – The Best Easy Dessert for Spring”